
Car Fixes & Fault Diagnostics

VW Touareg Park Brake Malfunction: Symptoms, Causes & Fix (2011–2016)
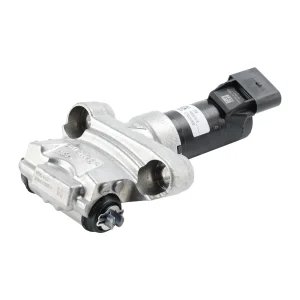
Quick answer: A Touareg park brake malfunction almost always traces back to a worn or seized rear park brake actuator
Quick answer: A Touareg park brake malfunction almost always traces back to a worn or seized rear park brake actuator
Quick answer: If your 2015–2018 Kia Sorento (4WD/AWD) is showing a “Park Brake Malfunction” warning, refusing to release, or grinding
In this manual, a step to step procedure on how to replace a faulty door lock actuator mechanism on a MAZDA 3 FOR bk 2003-2010 will be discussed. However, before we dive deep into this manual procedure, let us check out some information on MAZDA 3 LOCK PROBLEMS.
NOTE* THE COMPLETE VERSION WITH IMAGES MUST BE DOWNLOADED TOP RIGHT.
What are the symptoms of a MAZDA 3 lock problem?
Mazda 3 door lock problem can be caused by several things such as a bad wiring circuit, bad relay and a bad door lock actuator.
The symptoms of this is problem include:
Mazda 3 central locking not working:
Door lock and handle of the affected door not working properly:
Door not opening at all due to its actuator been stuck in the lock position.
Do I need a new MAZDA 3 lock actuator?
MAZDA 3 lock actuator could actually be the cause of your Mazda 3 central locking not working or other MAZDA 3 lock problem experienced with the vehicle, still, it is necessary to be certain if the door lock actuator is the real cause of the problem, since it won’t be nice getting a new door lock actuator and still experience the same problem.
To be certain you need a new MAZDA 3 lock actuator, a test by a technician needs to be performed on the vehicle, but since this is a DIY manual this information didn’t quite give the reply required the question.
To test if the MAZDA 3 lock actuator is the cause of the Mazda 3 central locking not working you will need a good light or a power probe tester, remove the door card, disconnect the connector socket going into the door lock actuator, if you are using a noid light look for a nice ground, then start touching inside of the connector with the noid light while pressing the lock and unlock button. Our objective is to see if we can get two point (depending on the vehicle model but usually a wht/blk and yelw/blk wires) in the connector where once the lock button is pressed the noid light illuminates at a point and won’t illuminate at the other point (turns to ground), while once the unlock button is pressed noid light illuminates at the other point and won’t illuminate at the first point (the first point turns to ground). If this was the scenario, it shows electric current find its way to the lock actuator motor but it won’t just function, this simply means you are having a MAZDA 3 lock problem resulting to Mazda 3 central locking not working due to the lock actuator.
How much does a Mazda 3 door lock actuator cost?
You can get the MAZDA 3 door lock actuator part or current price details on our website: https://partsfactoryaus.com.au/product/mazda-3-door-lock-actuator
Why pay a Technician when you can DIY (Do It Yourself)?
Now, let us return back to how we can replace mazda 3 door lock actuator:
Aim/Objective: Replacing mazda 3 door lock actuator.
List and Diagram of Tools Required: Flat head screwdriver, Torx bit set, Phillips head screwdriver.


Step to step procedure for replacing Mazda 3 door lock actuator.
Open up the door of the affected side to create space for the job about to be done
The best way to get started is by taking off the door card. To do this, follow Step 1. 
Step 1:
After the door card is removed the next step is to remove the door actuator mechanism. To do this, follow step 2.
The old faulty lock actuator mechanism had been removed successfully, It’s time to reinstall the new lock actuator mechanism. To do this, Follow Step 3 Step 3
Precautions

